 How to Measure a Screen for Anti-Glare Film
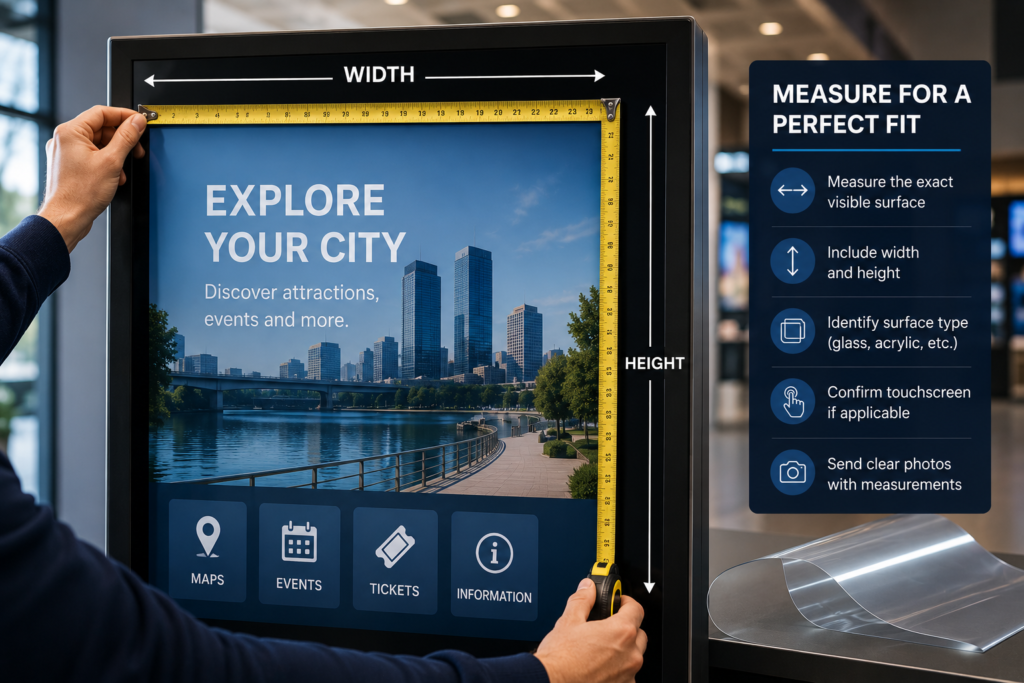
Measuring a screen for anti-glare film sounds simple.
Width. Height. Done.
But in the real world, display surfaces are rarely that clean. Some screens have bezels. Some sit behind protective glass. Some use acrylic covers. Some are touchscreens. Some are outdoor displays inside enclosures. Some are gas pump screens, ATM screens, menu boards, kiosks, or museum panels with custom frames.</p>
That means the right measurement is not always the full display size.
Usually, the most important measurement is the exact visible surface area where the film will be applied.
Getting this right matters. Accurate measurements help prevent wasted material, poor fit, exposed glare areas, edge overlap, installation problems, and quote delays.
This guide explains how to measure a screen for anti-glare film, what photos to send, what details matter, and how to prepare your project for a clean quote.
Why Accurate Measurements Matter
Anti-glare film is cut to fit the screen-facing surface.
If the film is too large, it may overlap the bezel, frame, buttons, sensors, speakers, or housing. If the film is too small, it may leave uncovered reflective areas around the edge.
Both problems can affect the final result.
Accurate measurements help with:
- Proper film sizing
- Cleaner installation
- Better edge alignment
- Faster quoting
- Less waste
- Fewer revisions
- Better fit on glass or acrylic
- Better planning for touchscreens
- Multi-screen project consistency
- Professional-looking results
If you are requesting Anti-Glare Film for one screen or a full multi-location rollout, clean measurements make everything easier.
What Area Should You Measure?
In most cases, measure the area where the film will physically be applied.
That may be:
- The visible display glass
- The protective glass in front of the display
- The acrylic cover over the screen
- The touchscreen surface
- The kiosk face panel
- The ATM screen window
- The gas pump display cover
- The menu board glass
- The museum exhibit panel
- The custom clear panel
Do not automatically measure the full monitor housing or full kiosk face unless the film is meant to cover that full area.
The safest question is:
Where will the film actually sit?
That is the area you measure.
Step 1: Measure the Width
Start by measuring the width of the application area from left to right.
Use a tape measure, ruler, or caliper depending on the size of the surface.
Measure the exact visible glass, acrylic, or screen-facing surface where the film should be applied.
Width Measurement Tips
- Measure left edge to right edge
- Keep the tape measure straight
- Do not angle the tape
- Avoid measuring the outer housing unless film covers the housing
- Measure inside the bezel if the film sits inside the frame
- Measure to the nearest practical fraction or decimal
- Use inches or millimeters
- Take a photo with the tape measure visible if possible
For example, if the screen image is 21 inches wide but the protective glass area is 23 inches wide, tell us which surface needs film.
That detail matters.
Step 2: Measure the Height
Next, measure the height from top to bottom.
Again, measure the actual surface where the film will be applied, not automatically the full display or housing.
Height Measurement Tips
- Measure top edge to bottom edge
- Keep the tape vertical
- Measure the film application area
- Note if there is a bezel or frame
- Confirm if the corners are square or rounded
- Check for buttons, sensors, cameras, or speakers
- Use the same unit as the width measurement
For anti-glare film quotes, width and height should always describe the exact surface area, not a guess based on the display model.
Step 3: Confirm the Surface Type
After measuring width and height, confirm the surface material.
This is important because Anti-Glare Film for Acrylic Panels may require different handling than film applied to glass.
Common surface types include:
- Glass
- Acrylic
- Touchscreen glass
- Protective glass
- Display glass
- Kiosk face panel
- ATM screen window
- Gas pump screen cover
- Menu board cover
- Museum exhibit glass
- Custom clear panel
If you are not sure whether the surface is glass or acrylic, send photos.
Photos of the edge, frame, and full installation area can help identify the surface.
Step 4: Confirm Whether It Is a Touchscreen
Touchscreen applications need extra review.
If the screen is touch-enabled, always mention it before ordering film.
Anti-Glare Film for Touchscreens can be used in many applications, but the touchscreen type, surface material, and installation conditions matter.
Confirm:
- Is the screen touch-enabled?
- Is it capacitive touch?
- Is it resistive touch?
- Is it behind glass?
- Is it behind acrylic?
- Will users touch the film directly?
- Is it indoors or outdoors?
- Is the touchscreen public-facing?
If you do not know the touchscreen type, send the display model if available.
If you do not have the model, send clear photos and describe how the screen is used.
Step 5: Check for Bezel, Frame, and Edge Details
A bezel or frame can affect the film size.
Some screens have a raised frame around the display. Others have flat glass that extends beyond the visible image area. Some kiosks have acrylic faces that cover the entire front panel.
Before submitting measurements, check:
- Is the application area inside a frame?
- Does the glass sit flush with the bezel?
- Is there a raised edge?
- Are the corners rounded?
- Are there buttons near the screen?
- Are there cameras or sensors?
- Are there speaker holes?
- Are there screw heads or hardware nearby?
- Is there enough edge clearance?
These details help determine whether the film should be cut to the visible screen, the glass surface, or the larger protective panel.
Step 6: Note Any Rounded Corners or Cutouts
Some screens and panels are not perfect rectangles.
They may include:
- Rounded corners
- Camera cutouts
- Sensor openings
- Button cutouts
- Speaker holes
- Notches
- Mounting hardware
- Keypad openings
- Card reader areas
- Vent openings
If the film needs to avoid these areas, include that information with your quote request.
For simple rectangular film, width and height may be enough. For custom shapes, drawings, templates, or clear photos may be needed.
This is especially important for kiosks, ATMs, gas pump screens, and custom acrylic panels.
Step 7: Count the Quantity
Quantity matters for quoting and production planning.
If every screen is the same size, send one size and the total count.
Example:
| Surface | Size | Quantity |
|---|---|---|
| Kiosk touchscreen | 21″ × 14″ | 12 |
If you have multiple sizes, list each size separately.
Example:
| Surface | Size | Quantity |
| Outdoor kiosk screen | 21″ × 14″ | 8 |
| Payment screen | 10″ × 7″ | 20 |
| Menu board cover | 48″ × 27″ | 6 |
For multi-location projects, include location notes if available.
Example:
| Location | Surface | Size | Quantity |
| Store 1 | Ordering kiosk | 21″ × 14″ | 4 |
| Store 2 | Ordering kiosk | 21″ × 14″ | 6 |
| Store 3 | Menu board | 48″ × 27″ | 3 |
This keeps the quote clean and helps avoid missed screens.
Step 8: Identify Indoor, Outdoor, or Covered Outdoor Use
The environment affects film recommendation and installation planning.
Tell us whether the screen is:
- Indoor
- Outdoor
- Covered outdoor
- Window-facing
- Under a canopy
- In direct sunlight
- In a shaded area
- In a high-touch public area
- In a premium visual environment
For example, a gas pump screen under a canopy is technically covered, but it may still face sunlight, vehicle reflections, and outdoor exposure.
Likewise, a retail display inside a storefront may be indoors, but it may still face strong sunlight through glass.
Environment matters because glare does not care what label we put on the room. Rude, but consistent.
Step 9: Choose Standard or Ultra Clear Film
Once the screen is measured, the next question is which film makes sense.
There are two main directions:
Standard Anti-Glare Film
Standard Anti-Glare Film is best when practical glare reduction is the main priority.
It is commonly used for:
- Outdoor displays
- Kiosks
- Gas pumps
- ATMs
- Menu boards
- Utility screens
- Public-facing displays
- Acrylic covers
- Transportation displays
Ultra Clear Anti-Glare Film
Ultra Clear Anti-Glare Film is best when image clarity and premium appearance matter more.
It is commonly used for:
- Retail storefront displays
- Museums
- Luxury showrooms
- Premium touchscreens
- Corporate lobbies
- Gallery screens
- Brand-focused displays
- Hospitality screens
If you are not sure which one you need, select “Not sure” when you request a quote and send photos.
Step 10: Send Photos With Your Measurements
Photos help confirm the measurement, surface type, frame condition, glare source, and installation environment.
For the fastest quote, send:
- Straight-on photo of the screen
- Close-up of the surface
- Photo showing the glare issue
- Side-angle photo
- Photo of the full installation area
- Photo of the frame or bezel
- Photo showing any buttons, sensors, or cutouts
- Photo with tape measure visible if possible
For outdoor displays, try to capture the glare during the worst time of day.
With touchscreens, send a photo showing the screen in use if possible.</p>
For acrylic panels, send a close-up of the edge if available.
How to Measure Different Display Types
Different applications need slightly different measuring strategies.
Measuring Outdoor Digital Displays
For Outdoor Displays</a>, measure the exact display-facing glass, acrylic, or protective cover surface.
Check whether the display is:
- Behind glass
- In an enclosure
- Exposed to sunlight
- Under a canopy
- Touch-enabled
- Installed flush or recessed
<li>Behind acrylic
Outdoor screens may need extra installation planning because of dust, weather, temperature, and access.
Measuring Kiosks
For Kiosks, do not assume the film only covers the screen image.
Many kiosks use a larger glass or acrylic face panel.
Measure the surface where the film should be applied:
- Touchscreen glass
- Protective glass
- Acrylic face panel
- Full kiosk front panel
- Display window only
Also note:
- Touchscreen status
- Bezel depth
- Rounded corners
- Cameras
- Card readers
- Buttons
- Speakers
- Payment hardware nearby
Kiosks often have more design details than a normal display, so photos are very helpful.
Measuring Gas Pump Screens
For Gas Pump Screens, measure the screen or protective surface where the film will sit.
Gas pump screens may include:
- Payment screens
- Loyalty displays
- Media screens
- Touchscreen prompts
- Receipt instruction screens
- Protective windows
- Pump face panels
Because gas pumps are often outdoors, include photos showing sunlight, canopy lighting, and viewing angle.
If you have multiple pumps, count the number of screens per pump and multiply carefully.
Example:
| Pump Count | Screens Per Pump | Total Film Pieces |
| 20 | 2 | 40 |
No one wants to order half a gas station. Math saves lives. Or at least shipping charges.
Measuring ATM Screens
For ATM Screens, measure the display window or touchscreen area.
ATMs may include:
- Recessed display windows
- Protective glass
- Touchscreen surfaces
- Button-interface screens
- Drive-up displays
- Walk-up display windows
Note if the screen is:
- Indoor
- Outdoor
- Drive-up
- Walk-up
- Touch-enabled
- Behind protective glass
- Exposed to direct sun
Because ATMs involve secure transaction screens, visibility and fit both matter.
Measuring Menu Boards
For Menu Boards, measure the display glass, acrylic cover, or protective panel.
Menu boards may include:
- Individual display screens
- Large acrylic covers
- Multi-screen menu systems
- Drive-thru displays
- Restaurant digital menus
- Food court signage
- Concession screens
If you have multiple menu boards, confirm whether every screen is the same size.
A restaurant may have six screens that look identical but are not. Ask me how I know. Actually, don’t. Just measure them.
Measuring Retail Storefront Displays
For Retail Storefront Displays, glare often comes from windows, storefront glass, polished floors, and bright lighting.
Measure the surface where film should go:
- Display glass
- Protective glass
- Acrylic cover
- Window-facing display surface
- Storefront screen cover
Also send photos from the viewer’s perspective. For storefronts, that often means from outside looking in.
If image clarity and brand presentation matter, Ultra Clear Anti-Glare Film may be the better choice.
Measuring Museum and Exhibit Surfaces
For Museums and Exhibits, measure the exhibit glass, acrylic panel, touchscreen, or protected display surface.
Museum projects may include:
- Artifact case glass
- Acrylic exhibit panels
- Interactive touchscreens
- Display case windows
- Visitor center screens
- Digital storytelling panels
- Educational kiosks
Because museums often require a cleaner visual finish, Ultra Clear Anti-Glare Film may be preferred.
Send photos of the exhibit lighting and viewing angle.
Measuring Acrylic Panels
For Acrylic Panels, measure the acrylic surface where film should be applied.
Acrylic applications may include:
- Protective display covers
- Kiosk face panels
- Museum panels
- Menu covers
- Signage covers
- Custom fabricated clear panels
Acrylic can scratch more easily than glass, so surface condition matters.
Send photos showing:
- Full panel
- Edges
- Surface scratches
- Mounting method
- Glare source
- Application area
If the acrylic flexes or has unusual mounting hardware, mention it.
Measuring Touchscreens
For Touchscreens, measure the touch-enabled surface area where the film will be applied.
Also confirm:
- Touchscreen type if known
- Glass or acrylic surface
- Indoor or outdoor use
- Whether users touch the film directly
- Whether the film must avoid sensors or buttons
- Whether the screen is behind a cover
Touchscreen projects need clean installation because the film becomes part of the user interaction surface.
Common Measuring Mistakes to Avoid
Measuring the Full Housing Instead of the Surface
Measure the film application area, not always the full display casing.
Forgetting the Bezel
If a bezel covers part of the screen, the film may need to fit inside it.
Ignoring Protective Glass or Acrylic
The display may be behind a larger protective panel. That panel may be the actual glare source.
Rounding Too Much
A rough estimate can lead to poor fit. Measure carefully.
Not Counting Every Screen
Multi-screen projects need exact quantities by size.
Forgetting Touchscreen Details
Always confirm whether users interact with the surface.
Not Sending Photos
Photos make quoting faster and more accurate.
Measuring During Installation Chaos
Do not measure while someone is holding the panel sideways, standing on one foot, and guessing. That is not a measurement. That is a future problem wearing a tool belt.
What to Send for a Quote
To request a quote, send:
- Width
- Height
- Quantity
- Surface type
- Application type
- Glass, acrylic, touchscreen, or protective cover
- Indoor or outdoor use
- Standard or Ultra Clear preference
- Photos of the screen
- Photos showing glare
- Shipping location
- Desired timeline
Use the Request an Anti-Glare Film Quote page to send your project information.
Helpful Quote Example
Here is a clean example of what to send:
Application: Outdoor touchscreen kiosk
Surface Type: Protective glass
Touchscreen: Yes
Use: Covered outdoor
Size: 21.25″ W × 13.75″ H
Quantity: 12
Film Preference: Not sure
Issue: Sun glare from afternoon light
Photos: Straight-on, close-up, glare photo, side angle
Shipping Location: Sacramento, CA
Timeline: Needed within 3 weeks
That gives enough information to start a real quote instead of a 14-email scavenger hunt.
Future Trends: Measurement Matters More as Displays Get More Custom
Commercial displays are becoming more specialized.
More businesses now use:
- Custom kiosks
- Outdoor touchscreens
- EV charger screens
- Digital menu systems
- Museum interactives
- Retail display walls
- Transportation kiosks
- Smart city signage
- Acrylic display covers
- Custom enclosure windows
As surfaces become more custom, accurate measurements become even more important.
The future of anti-glare film will not be one-size-fits-all. It will be custom-cut, application-specific, and planned around the exact display surface.
That means better measurements will lead to better results.
Final Takeaway
To measure a screen for anti-glare film, measure the exact surface where the film will be applied.
In most cases, that means the visible glass, acrylic, touchscreen, protective cover, or display-facing panel — not necessarily the full display housing.
For the fastest quote, send width, height, quantity, surface type, touchscreen status, indoor or outdoor use, film preference, and photos showing the glare problem.
Good measurements lead to better fit, cleaner installation, faster quotes, and fewer headaches.
To get started, send your project details through the Request an Anti-Glare Film Quote page.
FAQ
What part of the screen should I measure for anti-glare film?
Measure the exact surface where the film will be applied. That may be the display glass, protective glass, acrylic cover, touchscreen surface, or kiosk face panel.
Should I measure the full screen housing?
Usually no. Measure the visible application surface unless the film is intended to cover the full housing or face panel.
Should I measure in inches or millimeters?
Either is fine. Just be consistent and clearly label the unit.
What if the screen has rounded corners?
Mention the rounded corners and send photos. Custom shapes may require additional review.
What if the screen has buttons or sensors nearby?
Send photos and note the button or sensor locations. Film should not block important hardware.
What if I do not know whether the surface is glass or acrylic?
Send photos of the surface and panel edge. We can help review the application.
Do touchscreens need special measurement details?
Yes. Always confirm touchscreen use and describe whether users touch the film directly.
What photos should I send with measurements?
Send a straight-on photo, close-up, glare photo, side-angle photo, full installation photo, and a photo with a tape measure if possible.
Sources
OSHA workstation guidance recommends arranging lighting to avoid reflected glare on display screens:
https://www.osha.gov/etools/computer-workstations/workstation-environment
OSHA monitor guidance notes that monitor angle can create glare from ceiling lighting and that a glare screen may be needed:
https://www.osha.gov/etools/computer-workstations/components/monitors
3M installation and care resource for screen protection products:
https://www.3m.com/3M/en_US/privacy-screen-protectors-us/resources/installation-and-care/
Screen Solutions International:
https://ssidisplays.com/